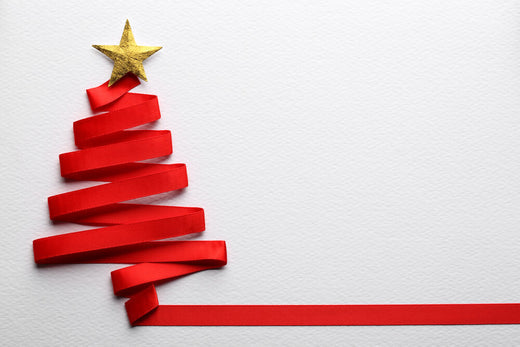
Step-by-Step Guide: How to Put Ribbon on a Christmas Tree
TL;DR: Learn how to put ribbon on a Christmas tree for a cohesive, polished look using simple techniques and smart planning. This guide covers materials, ribbon types and textures, how much to buy, two application methods, and the ideal decorating order for pro results.
- Gather essentials: ribbon, fabric scissors, floral wire or zip ties, wire cutters; patience is key.
- Choose ribbon: wired vs non wired; widths 2.5 to 4 inches for statement loops; mix textures like velvet, satin, burlap, and mesh with coordinated colors.
- Calculate quantity: about 9 feet per foot of tree, approximately 54 feet for a 6 foot tree; buy a little extra.
- Apply methods: Method 1 cascading loops with 2 foot pieces from the top; Method 2 wrap and tuck in a spiral or zig zag, alternating tight and loose tucks.
- Sequence and finish: add ribbon after lights and before ornaments; secure ends deep in branches with wire or zip ties; fluff, adjust, and top with a bow.
Are you ready to elevate your Christmas tree decorating game? Adding ribbon to your tree is a fantastic way to create a cohesive and polished look that will leave your guests in awe. In this guide, we'll walk you through how to put ribbon on a Christmas tree with ease and style.
Ribbon is incredibly versatile and can be used in a variety of ways to enhance your tree's overall appearance. With just a few simple steps and some creativity, you can transform your Christmas tree into a dazzling display. Read on to learn how to create a tree that will truly sparkle and shine this holiday season!
Materials Needed to Add Ribbon to a Christmas Tree
You don’t need many materials to successfully put ribbon on a Christmas tree. What you will need in abundance is patience! The more time you spend on measuring, cutting, and hanging your ribbon, the better the result will be!
Here are the basic materials you will need to put ribbon on your Christmas tree:
- The ribbon of your choice
- Fabric scissors
- Floral wire or zip ties to secure the ribbon
- Wire cutters, if necessary
Depending on your chosen design, you may choose to incorporate festive ribbon in various widths and colors. Consider investing in a ribbon storage box to keep your materials accessible and organized. This is especially key if you reuse them from year to year.
After gathering your materials, follow the steps below to achieve a neat and cohesive look.
Choosing Your Ribbon
When choosing your materials, you’ll need to decide between wired ribbon and non-wired ribbon.
In essence, wired ribbon is flexible ribbon with thin, posable floral wire sewn into the seams. This is somewhat easier to shape and work with. Non-wired ribbon does not have wire pre-stitched into the seams. While you can achieve a softer, more natural draped look with non-wired ribbon, it does require a little more effort and patience.
Ribbon Styles & Textures: Enhancing Your Tree’s Look
The ribbon you choose sets the tone for your entire design. If you are learning how to put ribbons on a Christmas tree, start by pairing one primary ribbon with one or two accent ribbons. Your primary ribbon carries the theme. Your accents support the theme and should add contrast and depth.
Here are a few tips to ensure your overall design contains compelling dimension that draws viewers in.
Consider the Texture
Textured ribbon adds depth and visual interest to your tree, serving as a satisfying sensory detail. You can find holiday ribbon in a broad range of fabrics and materials. Each type comes with its own unique visual and tactile qualities. Some evoke a classic Christmas aesthetic, while others add a more rustic or contemporary quality to your tree.
Some of our favorite ribbon textures include:
- Velvet, whichoffers a rich, plush look that feels classic and formal.
- Satin, which brings a smooth, subtle sheen that suits modern or minimalist styles.
- Burlap or linen, which creates a cozy, rustic feel, especially when paired with natural elements like berries or pinecones.
- Mesh and metallic ribbons, which add sparkle and volume with less effort. Glittery or shiny ribbon makes a big impact in less time.
The types of ribbon above may be available in solids, as well as prints. All can be used as either the primary or accent ribbon in your design.
Choose the Right Width
Mixing widths keeps the eye moving and prevents a flat, one-note look. Ribbons that are 2.5 to 4 inches wide are ideal for statement loops and cascades. Narrower widths, such as 1.5 inches, make great accents that weave between branches.
Coordinate Colors
Remember, your ribbon must also coordinate with any lights or ornaments you place on your tree. Even if you choose white lights, white is not necessarily neutral. White lights tend to come in both warm and cool temperatures, which can influence which colors look best.
For example, Warm white lights pair well with golds, reds, and traditional greens. Cool white lights complement silvers, blues, and crisp whites.
You can incorporate patterned ribbon into your designs, too. Though busy, we find that patterned ribbon also looks best in layers. Try combining a solid velvet with a subtle plaid or stripe to create contrast without overwhelming the tree.
How Much Ribbon Do I Need for My Christmas Tree?
On average, you will need about nine feet of ribbon per foot of your tree. Thus, you’ll need approximately 54 feet (or 18 yards) of ribbon to cover the average 6-foot tree.
That said, many variables affect the total amount you might need, including the width of the tree and how you choose to wrap it. Thus, we recommend buying more than you think you need.
On average, we’ve used 6 rolls of ribbon in our primary design and about 4 in our accent design. You will need more for a larger or wider tree. If you save your receipts, you can always return any unused, unopened rolls.
Method 1: Create Cascading Loops
To achieve the popular cascading ribbon look on your Christmas tree, you’ll need to create loops. Starting with your primary design, use fabric scissors to cut your ribbon into approximately two-foot lengths.
Once cut, the free end of the ribbon is inserted into the tree in the spot where you wish to start your ribbon cascade. We recommend starting at the top of the tree.
If using wired ribbon, it may stay without other materials. If using non-wired ribbon, you may need to secure it with floral wire or a zip tie. Secure the other end of the ribbon using the same method.
Secure the ribbon at an offset, or consider a diagonal loop for a candy-striped look.
Method 2: Wrap Your Tree

The “wrap and tuck” method is one of the easiest ways to use ribbon to decorate your Christmas tree.
Start at the top of the tree, securing the end of the ribbon with wire or a zip tie, if necessary. From there, wrap the tree in a downward spiral pattern. You may also choose a zig-zag pattern for a more dynamic look.
Tuck the ribbon into the branches as you go, securing it as necessary.
Alternate between loose and tight loops to give your tree a less curated look. The whimsy is part of what makes decorating with ribbon such a popular choice. If you wrap the ribbon too tightly or in too uniform a manner, it eliminates some of the charm.
After wrapping with your primary design, you can add your accent ribbon to fill in any gaps.
When to Add Ribbon in Your Decorating Process
For the smoothest experience, add ribbon after your lights and before your ornaments. This sequence makes putting ribbon on the Christmas tree simpler. We've also found that it helps you avoid snagging ornaments while you work.
First, string and test your lights like you normally would.
Next, add your ribbon using your preferred method, whether you choose cascading loops or a wrap and tuck. Work from the top of the tree downward, tucking ends into branches and securing as needed with floral wire or zip ties. This ensures you can add the ribbon effectively without disturbing or damaging other decorations.
Once the ribbon is in place, it’s safe to add your ornaments. We recommend starting with the largest ornaments to serve as anchors in your overall design. Then, you can fill in with small and medium ornaments. Finish by adding your tree topper.
Before you step away to admire your tree, consider a quick "fluff and adjust" pass. A few small tweaks to your loops or spiral can make the entire tree look more intentional and balanced. Then, enjoy your polished final result!
Fluff, Adjust, and Decorate!
Ornaments and lights often make gorgeous complements to Christmas trees decorated with ribbon. Consider traditional Christmas ball ornaments in complementary colors. Likewise, rustic ribbon décor looks great when accented with berries, branches, and other greenery.
You can also top a ribbon-decorated Christmas tree with a large, coordinated bow. This is a great way to use up any leftover ribbon. Choose your favorite ribbon-tying technique to create a stunning matching tree topper. Now, it will serve as the festive bow atop your stunning, fully-decked Christmas centerpiece!
When you’re done, be sure to store your ribbon properly for next Christmas or your next festive project!
FAQ: Quick Answers
Q: How much ribbon do I need for a 6-foot Christmas tree?
A: About 54 feet (9 feet per foot of tree height). Always buy a little extra.
Q: Should I put ribbon on before or after ornaments?
A: After lights and before ornaments for better spacing and design flow.
Q: What type of ribbon is best for creating loops on a Christmas tree?
A: Wired ribbon is best for maintaining shape and holding structure.
Q: How do I make sure my ribbon stays in place on the tree?
A: Use floral wire or zip ties, and tuck ends deep into the branches.

Leave a comment
Please note, comments must be approved before they are published
Jared Hendricks
Author